Don’t love the lighting in your home? Try this easy and affordable way to update a light fixture on a budget.
*As an Amazon affiliate, I earn from qualifying purchases at no extra cost to you. My blog contains other affiliate links as well for your convenience. To learn more, you may read my Disclosure Policy. Thank you for supporting my blog!
Home Improvement Projects On A Budget
Over the years, my husband Kirk and I have tackled a wide range of home improvement projects. From a simple bathroom vanity refresh to learning how to install tile plank floors, and more. We’ve slowly (and I do mean slowly) been working to transform our home one room at a time.
Last fall, we tackled our biggest project to date, phase one of our cottage kitchen refresh. I promised to share more details about some of the projects from the reno. Now that a year has passed, I decided it’s about time to make good on that promise.
Today I’m sharing the easy way to update any light fixture in your home that won’t break the bank.
Easy And Affordable Way To Update A Light Fixture
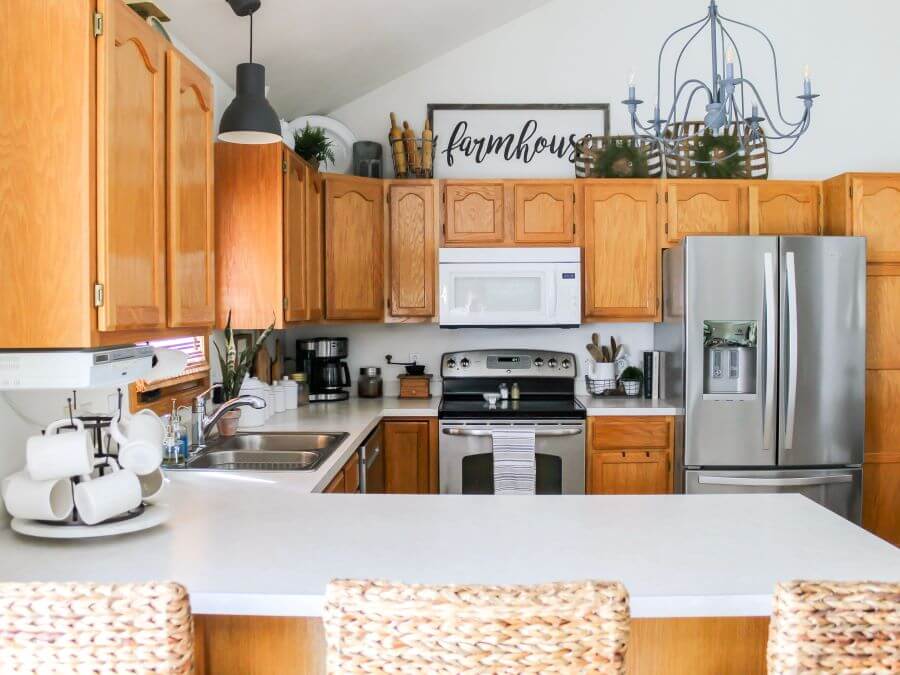
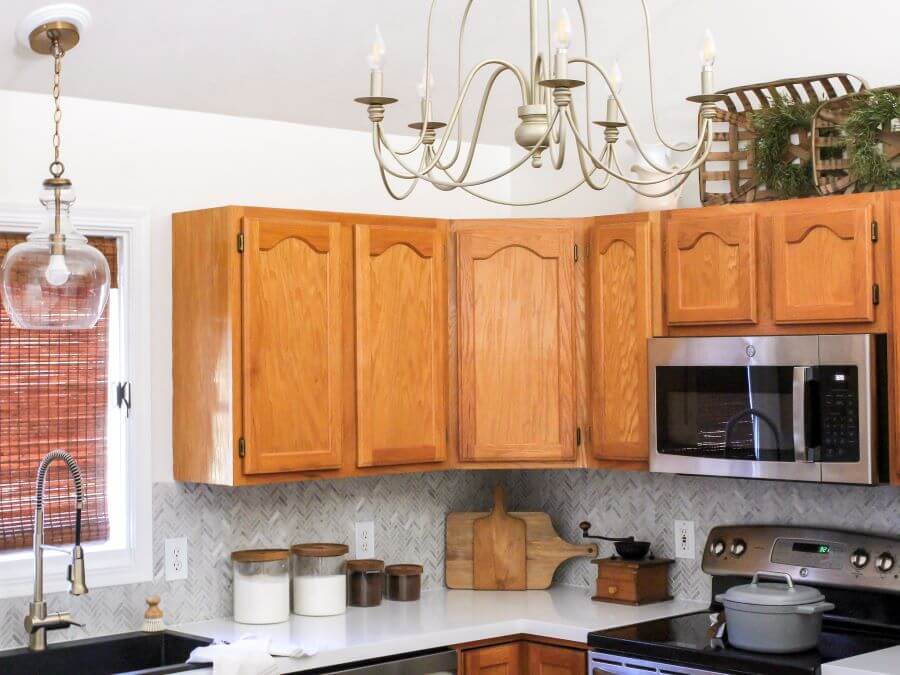
This was the starting point for our kitchen last fall. And while it was perfectly functional, it just didn’t feel like “us”. One of the things I knew I wanted to do was update the lighting.
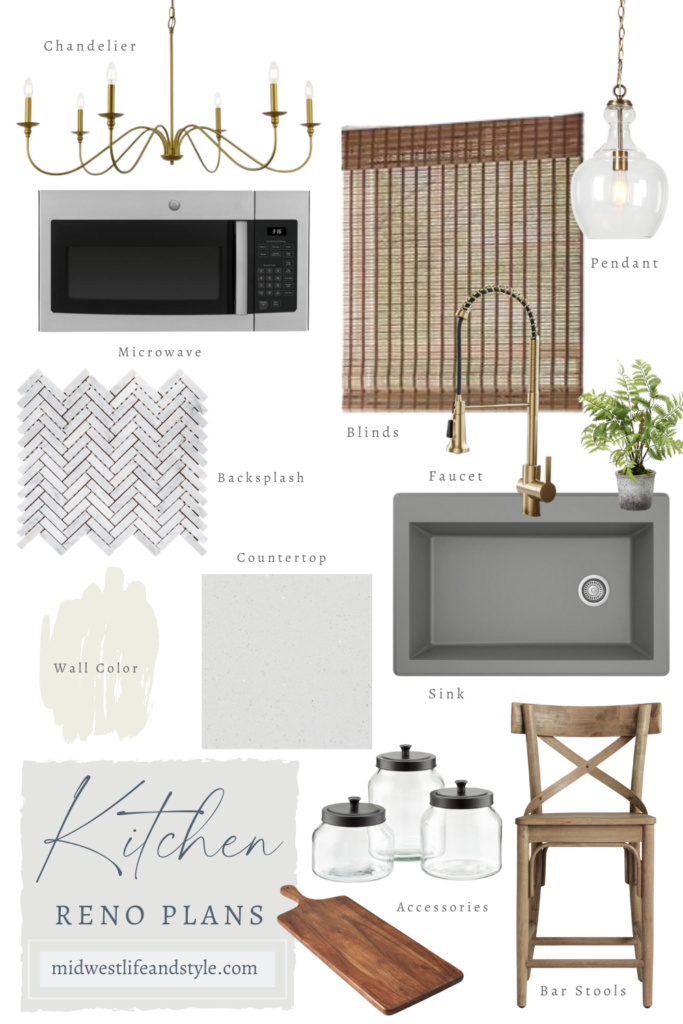
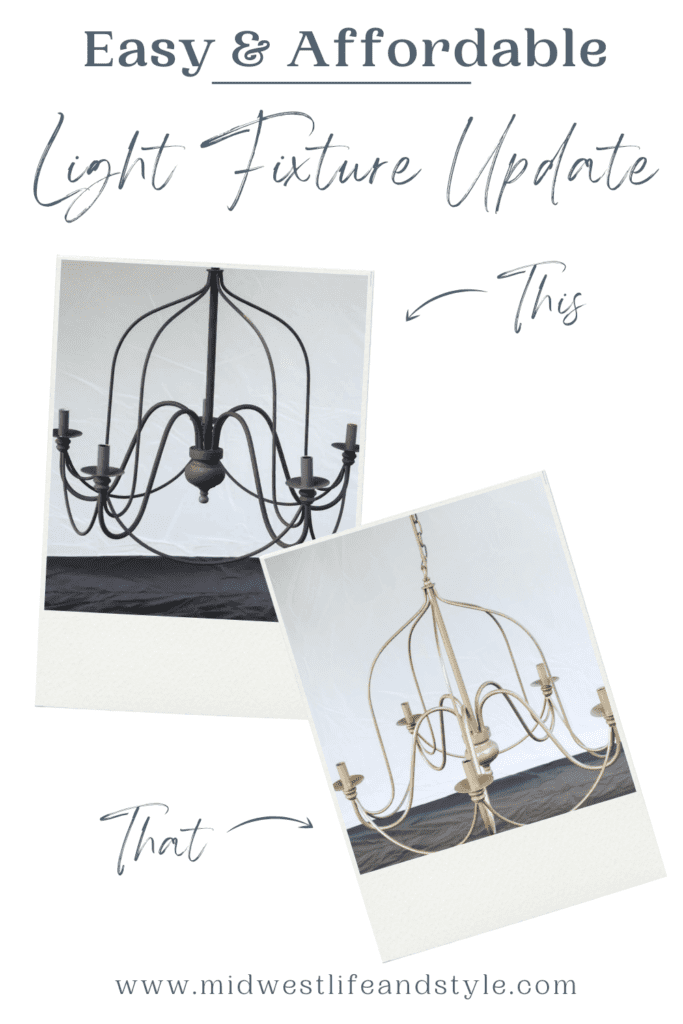
This is the design board I created to help customize our outdated kitchen. Originally, we planned to buy a new brass chandelier. But many of the ones I loved were well over $200, so I came up with a new plan…I decided to spray paint our existing one!
Here is the easy step-by-step process for how to make an old light fixture in your home look brand new for under $20!
Step One: Turn Off The Power And Remove The Light Fixture
First, a disclaimer. I (we) are not diy professionals. If you have any questions or concerns about projects in your home, please, please, please always consult with a trusted professional before you begin.
The first thing you want to do before you start any electrical project is to turn off the power to the room where you are working. Find the correct breaker in your panel box, and test that the light is off before you start any other work!
Once the power is off, carefully remove the old fixture and disconnect the wires.
Step Two: Clean And Prepare The Light Fixture
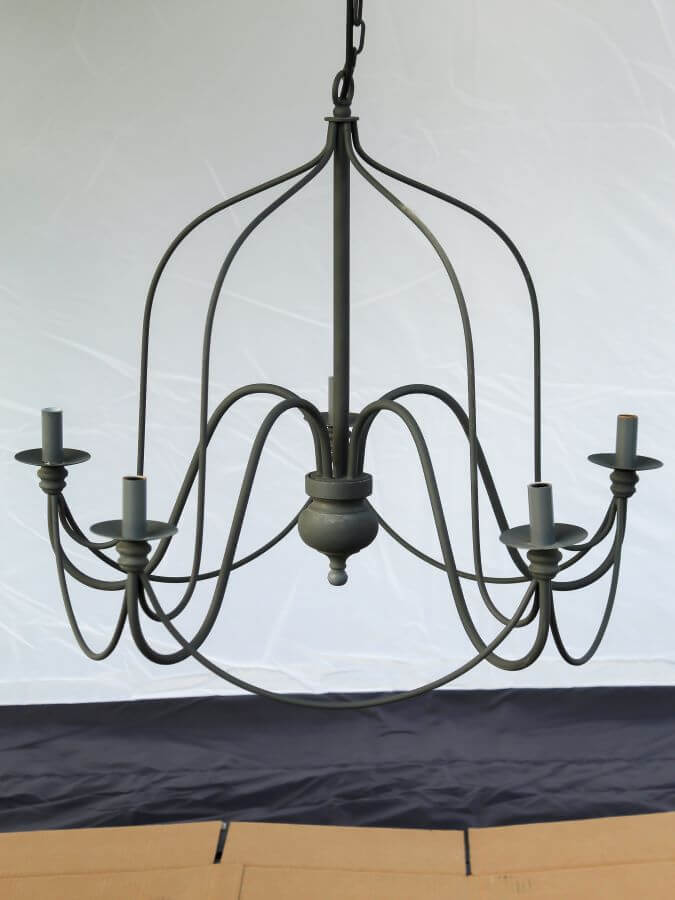
Once the light has been removed, it’s time to clean and prep it for painting! Before I started to paint, I removed all of the lightbulbs from the fixture.
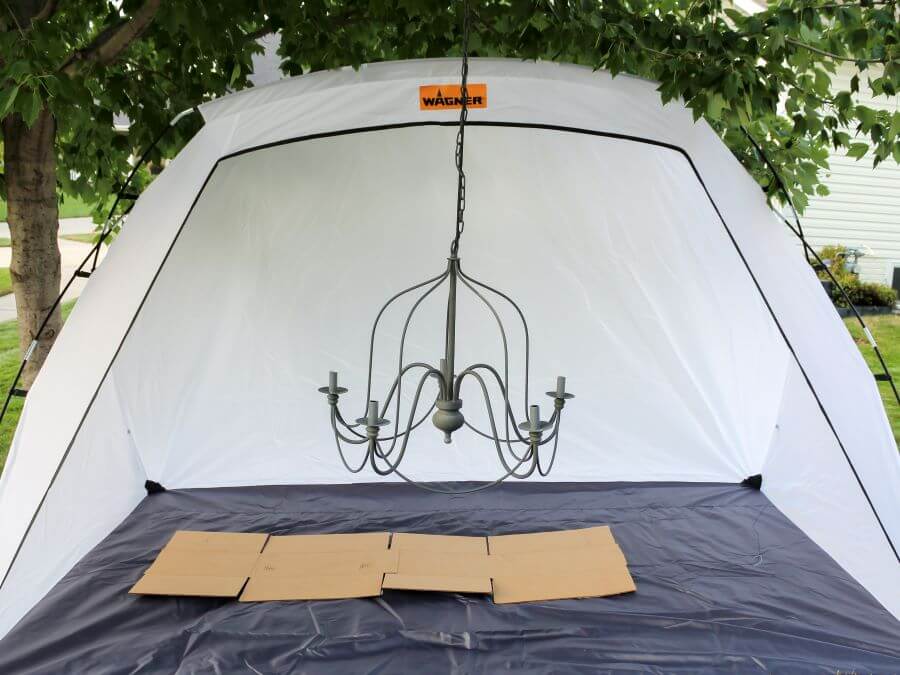
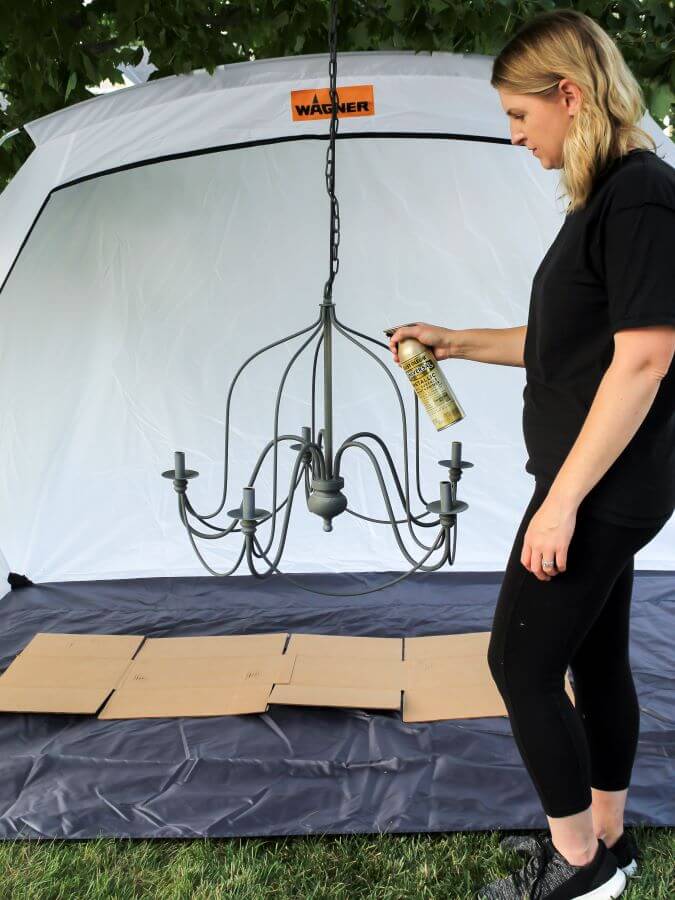
Then I set up shop outside in our front yard.
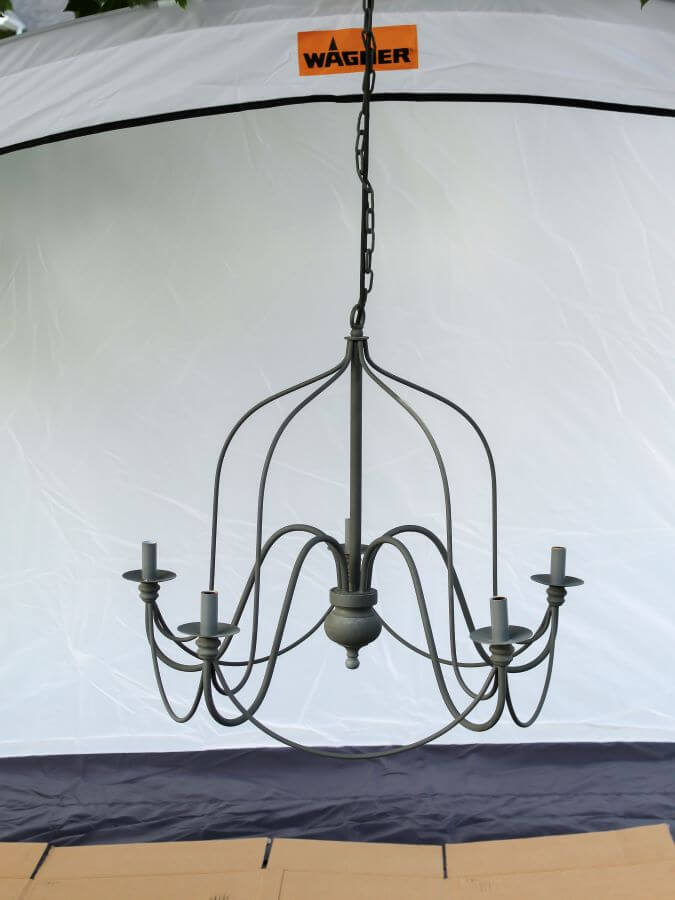
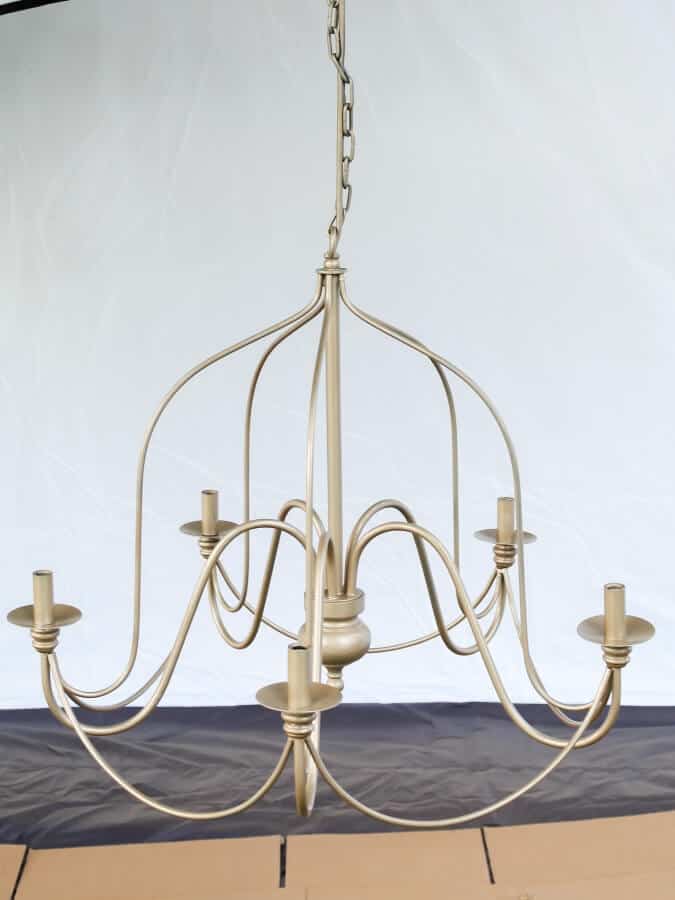
If you are painting a large light like a chandelier, I recommend hanging it. Trust me; it will make the painting process go much more smoothly.
Because our sawhorses were too short to hang our chandelier my husband improvised and attached it to a large tree limb in our front yard.
Tada!
Pretty fancy, right? Our high-tech setup prompted more than a few questions from some curious neighbors.
Once my husband hung the chandelier, I set up a spray tent around it to protect the landscaping from overspray.
If you don’t have a spray tent, you can use cardboard boxes to help minimize the mess.
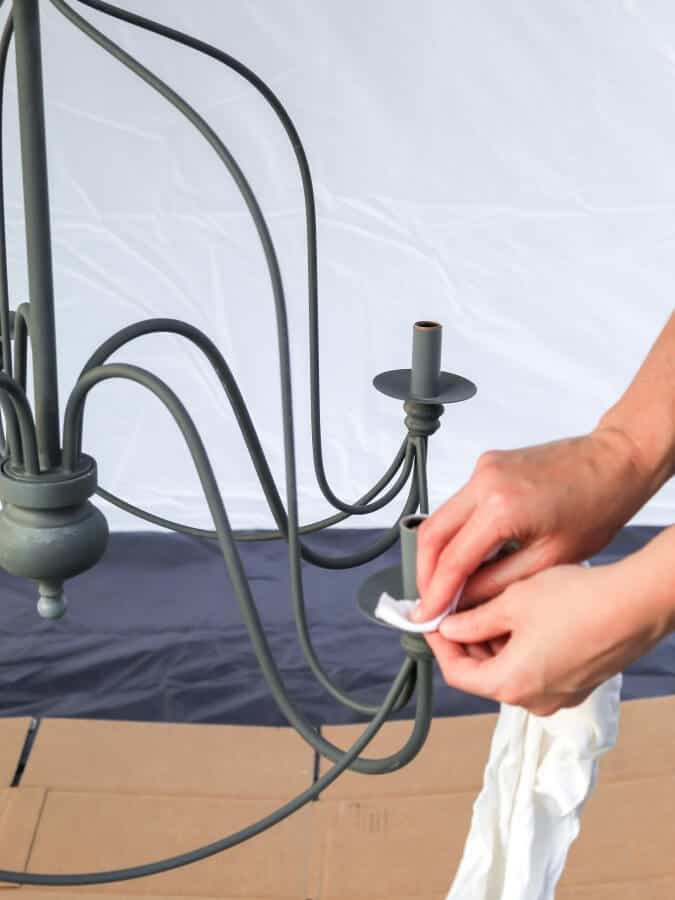
Then, I used a damp cloth (an old t-shirt will work too!) to thoroughly wipe down the light fixture and remove any dust or cobwebs.
Step Three: Paint The Light Fixture
Now for the easiest (and in my opinion) most fun part of the project…the painting!
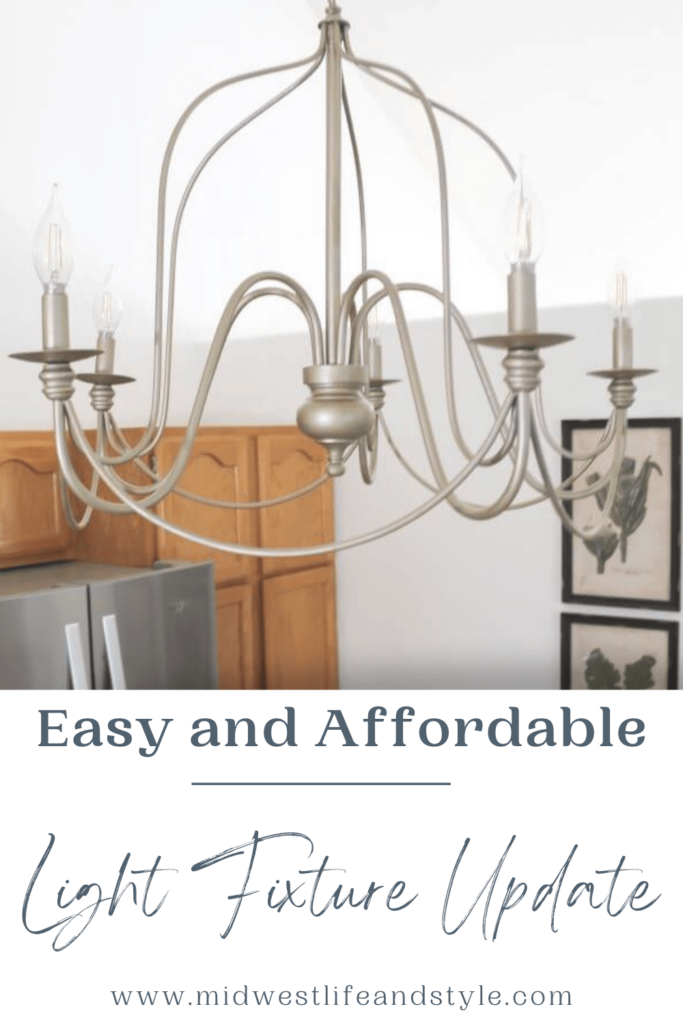
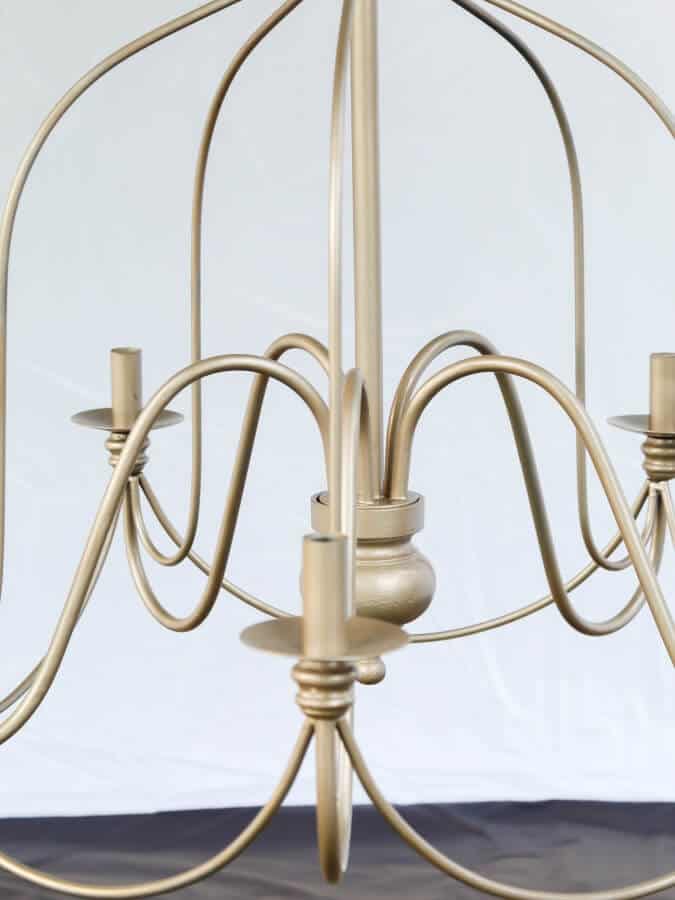
I picked out some champagne-colored spray paint to match the pendant above our sink.
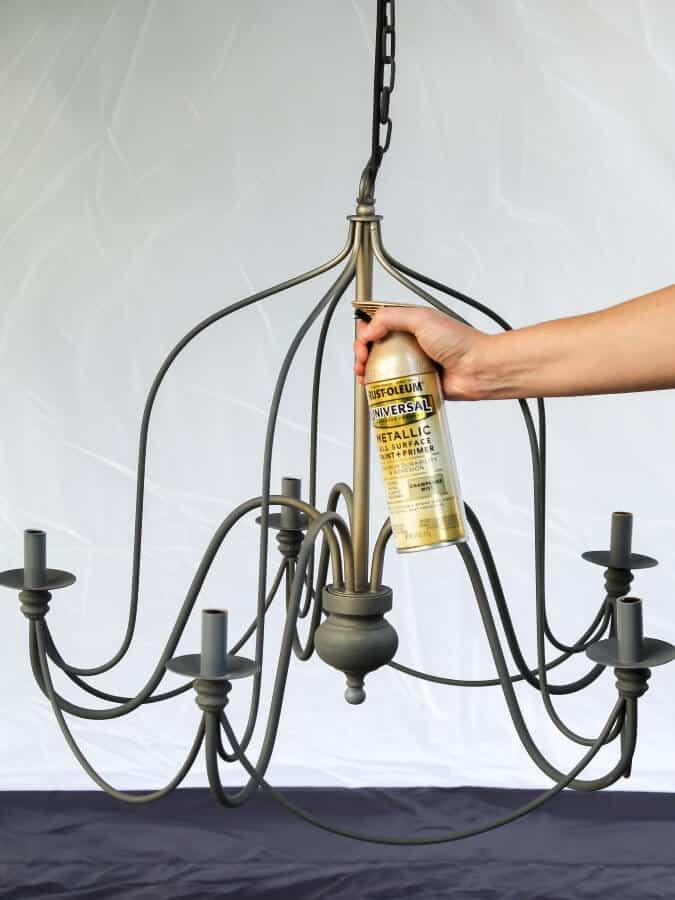
To start, I used quick short strokes and sprayed one oven coat of paint over the entire chandelier.
You can already see the difference here. Isn’t the power of paint amazing?
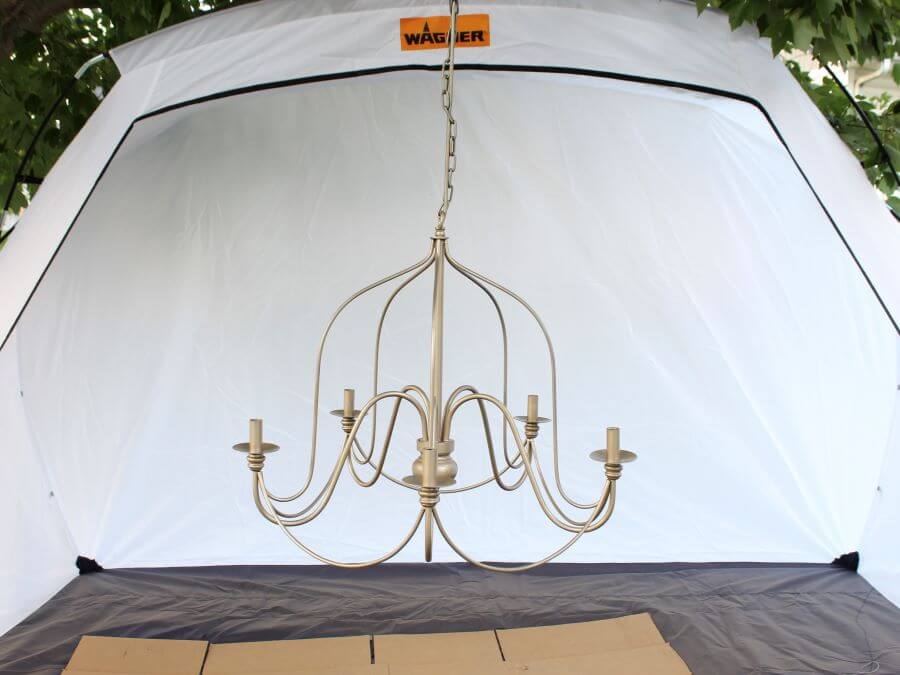
This is the light fixture after just one coat of spray paint.
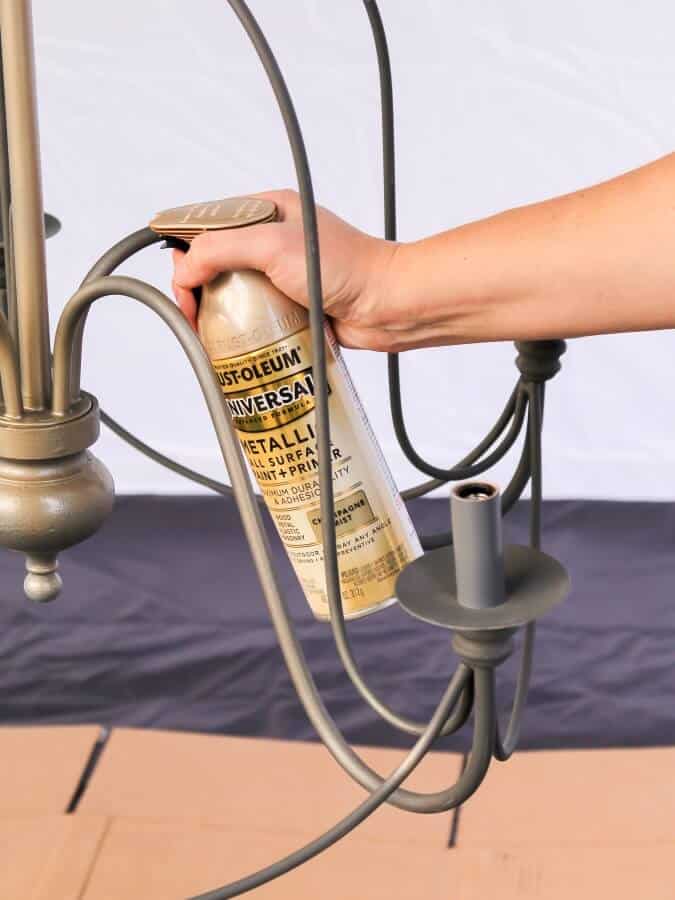
I let the paint dry for a few hours until it was fully cured and not sticky. Note that your dry time may vary based on the temperature and humidity in your location.
Once the paint was dry, I sprayed a second coat and touched up a few spots that I missed. For this light, I only used about two and a half cans of paint. Not too bad for less than twenty bucks!
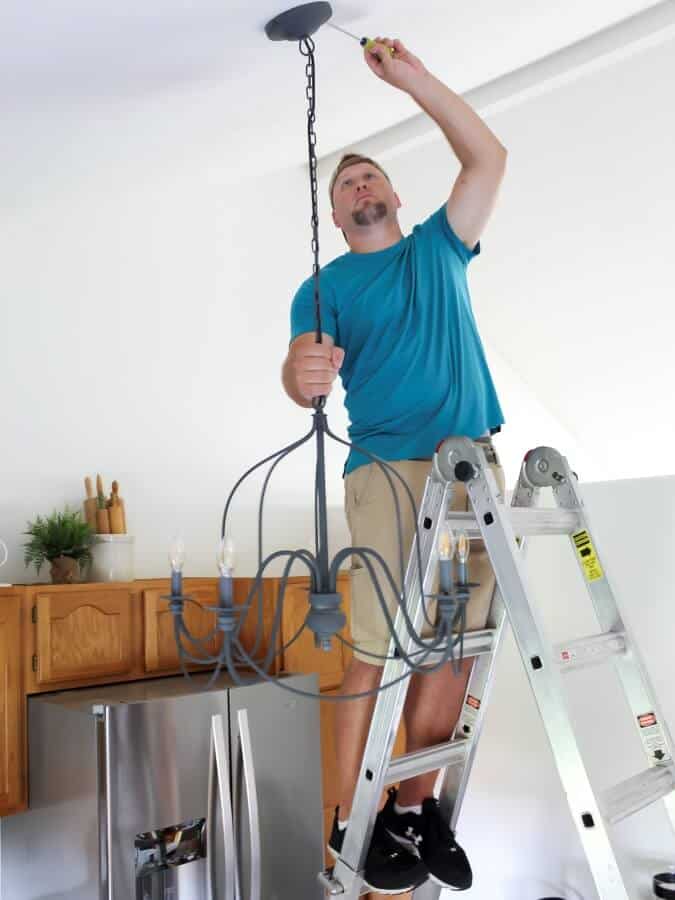
Step Four: Reinstall The Light Fixture
When the paint is completely dry, reinstall your light fixture. Make sure the power is off and reconnect the appropriate wires.
Tip: Once the wires are connected, turn the power to the fixture back on and test that it has been installed correctly before you attach the cover plate. If the light does not turn on, turn the power back off, and re-check your wires.
Once everything is connected properly and the power is on, step back and admire your work!
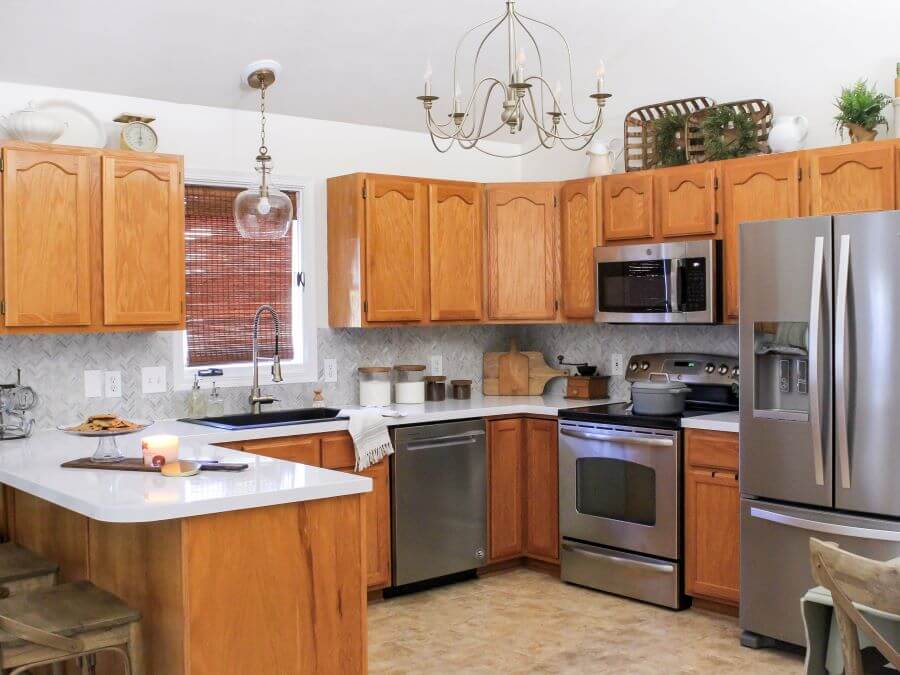
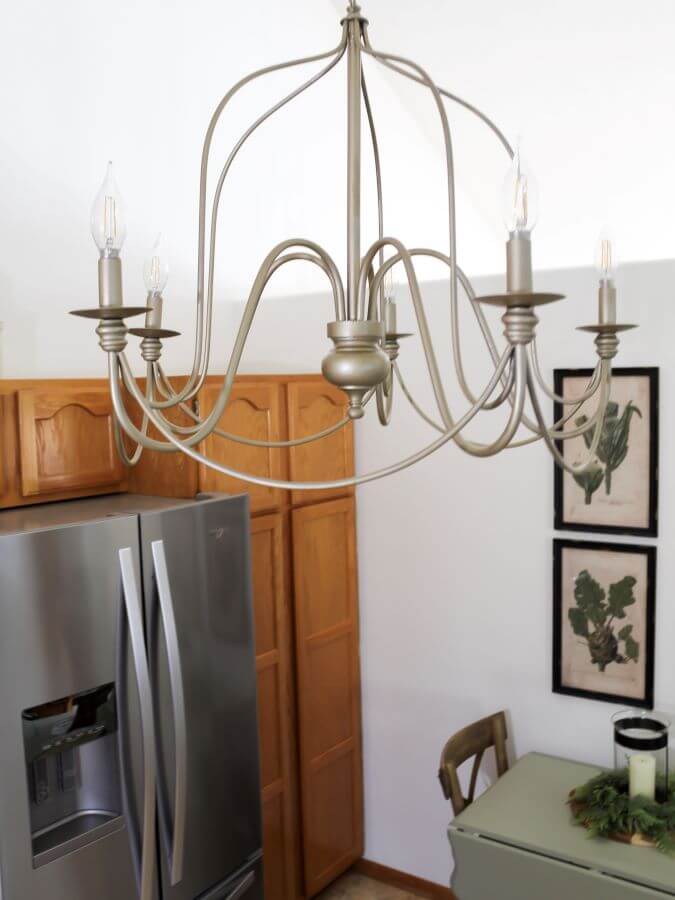
Here is what our chandelier looks like in the kitchen. I love the transformation of the chandelier from farmhouse style to the more modern cottage look. It looks brand new and you’d never guess it was spray painted.
Easy And Affordable Way To Update A Light Fixture
As always, thanks so much for stopping by! I hope you enjoyed this easy and affordable hack for how to update a light fixture.
Would you try this in your home? What other budget-friendly home hacks would you like to see? I’m currently making a list of projects for the new year, so let me know your ideas in the comments, and it may just be our next DIY!
Xo,

Did You Enjoy this Post? PIN It for Later!

It looks SO good, Jen!! Such an amazing transformation for only a few dollars. It’s amazing what paint can do!!
So true! Paint is one of the best “secret” weapons for a quick and cheap makeover!
Love it when you can save money and it turns out beautifully! Happy Monday. Hope this week is less chaotic than last week!
Right? Yay for budget-friendly upgrades. Happy Monday to you too, friend. Hope you have a great week!
Just pinned and share this on my From the Front Porch post today, Jen! This is such a fantastic makeover. It seriously doesn’t even look like the same chandelier. I swear, the power of paint never ceases to amaze me, Hope you’ve had the best week, CoCo
I agree! Paint can do amazing things! And thank you so much for sharing. Heading over now to check it out!😊
Jen this is a great idea – I’m planning to do it at some point with the chandy I have in the family room. It’s such an easy update! Thanks for posting and I’m sharing in my sunday post today! xo
Thank you so much, Stacy. I appreciate it and can’t wait to see how your update turns out!